Wednesday 21 August 2013

Angel Food

    So, last night was the return of the Great British Bake Off, only possibly the most exciting thing to happen in my life in the month of August. And let me tell you, it was a cracker. This show always gets me motivated to spend more time in the kitchen, it also seems to have a significant impact on our waistlines. but who can resist Mary Berry and an hour of cakes, breads and other glutinous goodies once a week? I, for one, cannot.
Mary Berry, baking legend.
    I received a text today from my friend Sally, who, like myself, loves all things tasty. But Sally has been trying very hard and thus far successfully to stick to a healthy diet, and her text was one of dismay. Apparently my recent surge in posts has thrown lemon curd and scones and other tasty and generally diet unfriendly treats out there to tempt her. I value Sally as a friend, and I respect her will power a great deal (or maybe I'm just a little bit scared of what she'll do to me if I make her mad) so I promised her something fat free in my next post. Conveniently, Marry had my back and featured Angel Food Cake as the technical challenge on last night's episode of the Bake-Off. My husband ogled and drooled, and I realised that I hadn't had any angel food since moving to the UK nearly six years ago. For an American, Angel Food and fresh berries are sort of a summer staple. So this morning I strolled up to my local Tesco and bought myself some eggs and caster sugar and came home determined that I would at least give it one shot. If it failed (as many of my baking endeavours tend to) I would lay it to rest forever and stick to Victoria Sponges for the rest of my life.
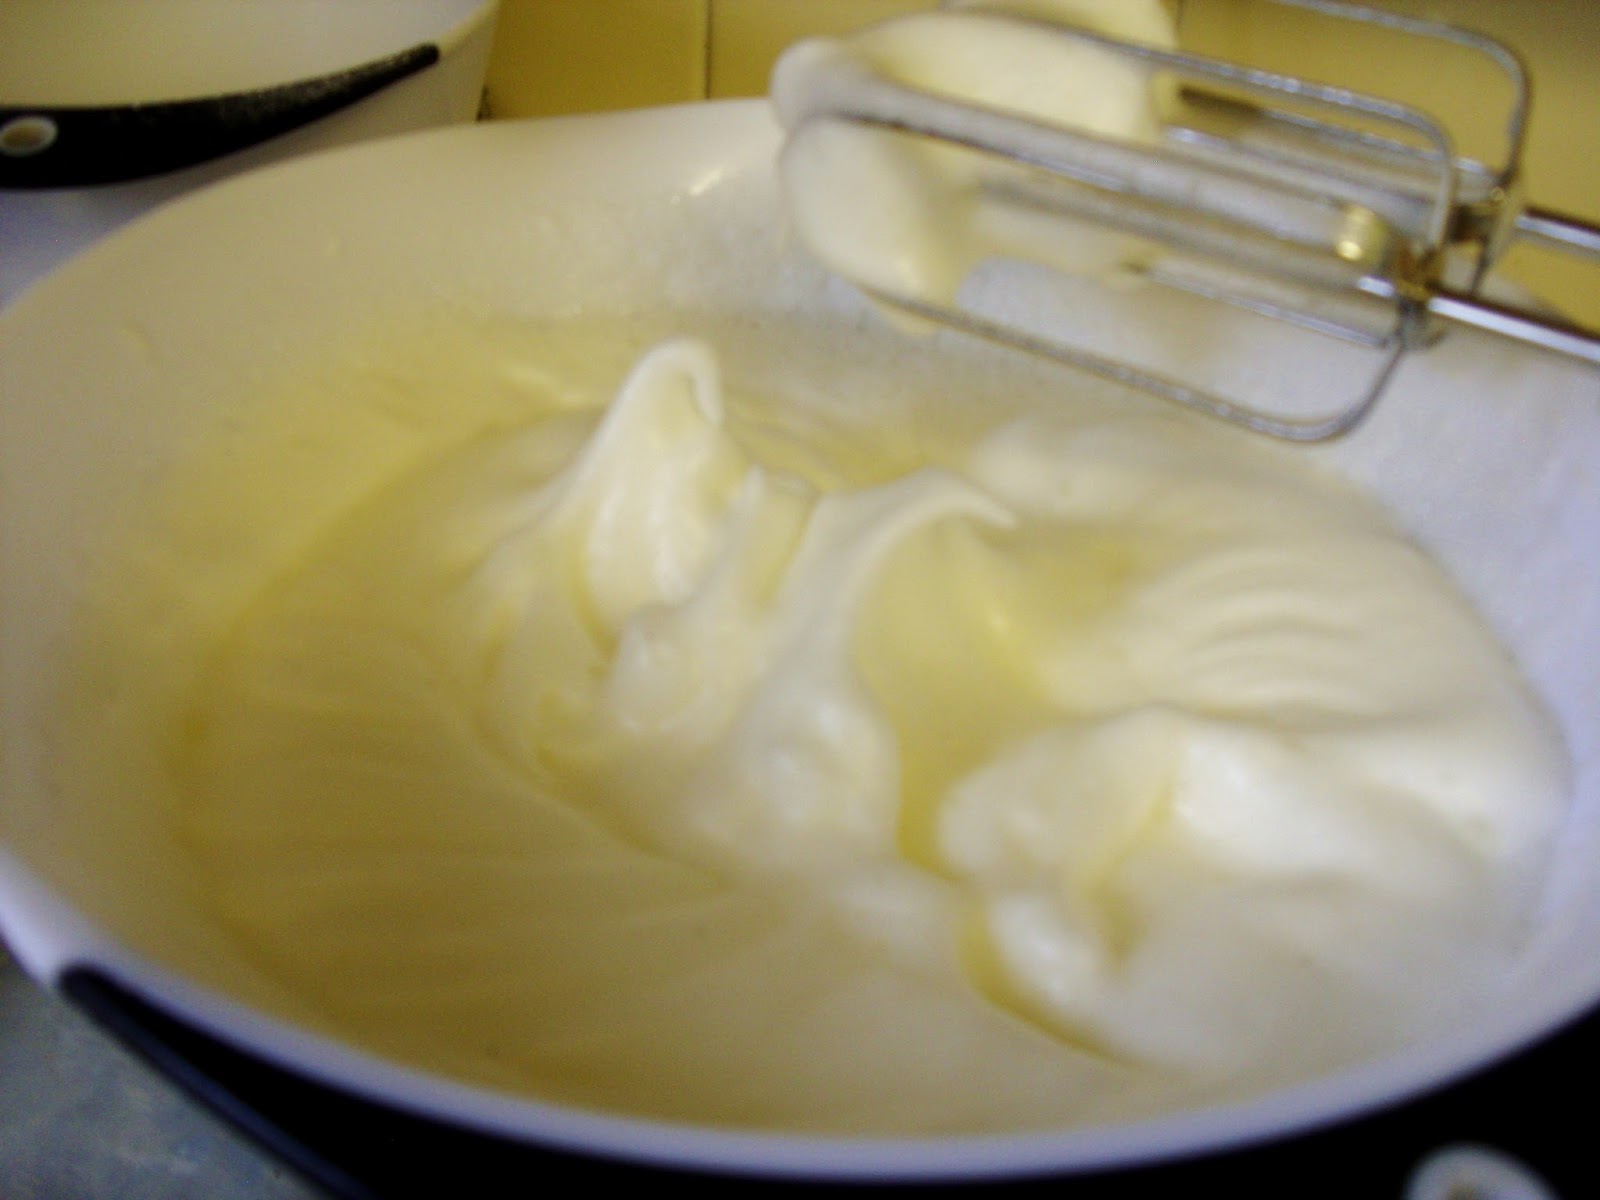
Soft peaks, in case you wondered.
    The BBC hasn't posted Mary's tried and true home baker recipe for this heavenly treat yet, so I went on an internet adventure and after watching several videos and skimming a few recipes, came up with the following.

Angel Food Cake

10 Egg whites
1 tsp. cream of tartar
1 tsp. vanilla extract
1/2 tsp. almond extract
250 g (9 oz) caster sugar
Folding in the flour.

125g (4 1/2 oz) plain white flour (sifted) 

1. Preheat the over to 180 C (350 F). Whisk the egg whites in a large bowl until they become foamy. Sprinkle in the cream of tartar and the vanilla and almond extracts. Continue whisking until the mixture forms soft peaks.
2. Add the sugar, one tablespoon at a time, whisking continuously. When all the sugar is added the mixture should be shiny and form soft peaks.
3. Fold the flour in with a metal spoon or spatula, blending it thoroughly without breaking down the egg whites. I alternated between sifting in about half a cup of flour and folding, so that the flour didn't form lumps.
4. Spoon the mixture into an UNGREASED ring shaped (bundt) cake tin. Cut a cake knife or spatula trough the mix to let out and large air pockets and smooth the top.
5. Bake on the lowest shelf in the oven for 45 minutes or until the cake has risen, browned and cracked on top and is dry (if a toothpick inserted into the middle comes out clean, it's done).
6. Leave the cake to cool UPSIDE DOWN for at least an hour and a half, this ensures that it doesn't collapse on itself while cooling.
Cooling upside down.
7. Use a cake knife, knife or spatula around the edges to remove the cooled cake from the tin. Cut into slices with a bread knife (or any knife, serrated is just easiest) and serve with whatever you fancy. I like fresh berries and whipped cream, but Mary used lemon curd, and other members of my family like chocolate sauce or ice cream. Really it goes well with anything. 

    I had a couple issues with this cake, mainly to do with my egg whites. I used a hand-help electric mixer, and I think I may have over whisked my egg whites while I was adding the sugar, because they had been stiff enough to form soft peaks, but they loosened up again by the time the sugar was in. Next time I'll use a lower speed setting on the mixer. Also, I didn't have any vanilla or almond extract around the house (and they're expensive to buy) but I did have some vanilla paste, so I subbed in 1/4 tsp. vanilla paste for the extract and left out the almond altogether. Now, I haven't cut into it yet (although I really really want to), but it rose fine in the oven, didn't collapse on me while cooling, and now I have it out of the tin it looks like it has baked really nice and evenly. So all in all I'm really happy with the result and will definitely be baking this one again!
Looks pretty angelic to me!
    Sally, I hope you enjoy this one, it's completely fat free and there's not really that much sugar in it either, if you keep off the cream and just have it with some fresh berries (maybe do a quick compote with them) it's fairly diet friendly.


Tuesday 20 August 2013

Before You Know it, it Scone!

    My husband's family is from Devon, and so is one of my best friends. Luckily we don't run into many people from Cornwall, so I can safely say that it's cream first then jam. But the vote is still out on whether to pronounce it 'Scon' or 'Scone'. I like 'Scon' myself, because it makes the play on words (see title) work. Regardless of how you pronounce it or whether you put your cream or jam on first, Scones are a British tea-time staple, and it seems that with the popularity of Downton Abbey and the rebirth of the historical drama in the US (my homeland), tea time is becoming a new American favourite as well. in fact over the summer one of my younger sisters got married, and as a treat, took all of her bridesmaids (myself included) to a tea room in Dallas Texas, for afternoon tea. 
My little sister's sad attempt at a Cream Tea. At least she has a tea pot!
    Now I had tea parties as a girl (or hot chocolate parties, since I wasn't a tea drinker back in the 80's) but usually they involved dolls and dressing up and whatever cookies or cupcakes my mom happened to have in the pantry at the time. I was later introduced to the magnificence that is Earl Grey by my mother in my teenage years, then at University I discovered a loose-leaf tea shop in Pike Place Market, Seattle, where I became a bit of a regular. So when I moved to the UK and was introduced to the Great British Cream Tea, I got a little excited. And what was this odd cream-butter substance called clotted cream that my husband and father-in-law ate by the spoonful? My education had well and truly begun.
     It wasn't long before my mother-in-law shared her tried and true recipe for scones with me, so I could have warm ones straight from the oven, instead of the stale numbers from the shop. I can't say that these are the best scones I've ever had (you really do have to go to Devon for those), but they are a fairly decent substitute. My youngest sister recently posted a photo of her poor student attempt at a cream tea, it included French bread, and I decided that I would help her out and post my mum-in-law's scone recipe for her and anyone else who is struggling with cream tea fare. I've done my best with the conversions for all you American's out there who don't own a kitchen scale.

Scones
225g (8oz) (1 1/2 cups) self raising flour or plain flour with 3 tsp. baking powder sifted together
1/2 tsp salt (unless your self-raising flour has salt in it already - US self-raising tends to)
55g (2oz) (4 Tbsp.) butter
25g (1oz) (3 Tbsp.) caster sugar
150mL (5oz) (2/3 cup) milk
1 egg, beaten
1. Preheat the oven to 220 C (425 F). Lightly grease a baking sheet. Or use a non stick sheet or wax paper or one of those silicone mats.
2. Mix together the flour, salt and butter. Rub them together by hand untill they form a crumbly texture and the butter is evenly distributed.
3. Stir in the sugar and then add the milk slowly until a soft dough is formed. This may not take all the milk, or if your mix is dry add a little extra milk. You want it soft and moist, but not out of control sticky.
4. turn out onto a floured surface a knead gently until all the ingredients are mixed evenly. DO NOT OVERWORK, it makes the baked scones tough and horrible.
5. Pat out the dough into a 2-3 cm thick round. Use a floured round cutter (or a glass) to cut out circles.
6. place the rounds onto the baking sheet and brush the tops with the beaten egg (not the sides, or they won't rise properly).
7. bake for 12-15 minutes until well risen and golden on top.
This is what they should look like. I nicked this picture off Wikipedia.
    Sadly I don't have any pictures of my scones, they all get eaten too fast. There may be one in a previous jam post. But they do come out looking about the same. There are also tons of other recipes for different types of scones out there, mine are plain sweet scones, but you can get sweet ones with fruit in them, or savoury ones with cheese or herbs. They're really versatile. If you seem to struggle with high altitude, try a different recipe or add in a quarter teaspoon of bicarb (baking soda). I've never tried to make them in Denver, So I really don't know how the altitude would effect them. Let me know how it goes!


Strawberry Jam

    I realise that it's a bit silly of me not to post about Strawberry Jam until now. I make it all the time, it's probably leader of the universal favourite jam competition by a long ways. Everyone has this in their fridge, lots of people make it themselves, basically I'm a numpty. but I'm glad I've saved it until now actually, because my last batch was by far the best I've ever made. Not that you can taste it (sorry), but I've discovered that the (not so) secret to good strawberry jam is the quality of the berries. And these were some pretty darn good berries. I picked these from my friend's PYO, West Green Fruits, a few weeks ago. I wish I could do an online scratch and sniff of what the strawberry fields smelled like, because it was heavenly. I also wish you could have tasted these berries, they were the best strawberries I have ever tasted in my life. I sadly forgot my camera that day as well, or you could see a picture of all out juicy chins from eating while we picked.
    Now I did a naughty thing and froze my strawberries in order to get them home, and they went all soggy when they defrosted. But as I was planning to make jam out of them anyway, that didn't really matter so much. It did make hulling them a big mess though, so I highly recommend using fresh berries.
    As per usual, I got out my Jam book, The Joy of Jams, Jellies and other Sweet Preserves, and used it as a guide. this is the usual recipe I use for Strawberry Jam, but i use less sugar, and this time I used way less sugar because the berries themselves were really lovely and sweet already.
       Now I know that there is a big debate going on in the UK right now over the fine line between a jam and a preserve, apparently unless you use a certain amount of sugar, you can't call it jam. I think this is rubbish and feeds our ever growing love affair with sugar. Also, when I have jam on my toast, I like to be able to differentiate between the different fruits. I had to purchase some store-bought strawberry and raspberry jam a few months ago (soft fruit season hadn't started yet) and I couldn't tell which one I was eating, they both just tasted too sweet and the berries got lost in all that sugar. So when i make jam (especially strawberry) I almost always cut the sugar content, this way you get the flavour of the berries, and a little acidic zing as well. Here's my stalwart recipe:
Strawberry Jam
1 pound of strawberries (hulled)
1 cup of sugar
2 Tbsp. lemon juice
    You bang it all into your preserving pan together, heat it over medium heat until the sugar is dissolved, then turn up the heat and bring it to a boil, stirring frequently. Test it on a chilled plate, when a mound forms (or a skin crumples on your finger when you push it through the jam). then into your sterilised jars, label and allow it to cool.
    Now, as I said, I didn't add as much sugar this time because the berries were pretty sweet on their own. So typically what I do if I'm not sure how much sugar to add in is I start with half the amount, I let that dissolve and then I do a taste test, if it's too acidic, or not sweet enough, I add more sugar to taste. I think I used about 3/4 a cup this time. but the less sugar you add the longer it will take to reach the setting stage, so keep that in mind. I also find that this recipe can be doubled, but not tripled, large batches need more lemon juice, more sugar and/or a bit of extra pectin (either from another fruit source or from the shop) and take a long time to make. I prefer to make smaller batches. You can easily hull the second batch of strawberries while the first batch is coming to the boil.

Drawing the Curtains on Fugly Home Decor

    I was just going through some of my photos and I came across these beauties. I had taken these specifically for a post about making my own curtains, that apparently I never got around to writing. You may recall about a year ago I wrote a post about my new house and all the work that needed doing to get it to look like my husband and I lived in it as opposed to a tramp from the 60's. My first big task was curtains, because the ones we had were pretty fugly and really didn't even work that well.
    I tackled the master bedroom first, because that's where we sleep (obviously) and needed some morning light blocked out. I had (and seem to still not have) any money to purchase curtains, I couldn't find any that I liked anyway, and I couldn't even really find any fabric that I fancied (Sheffield is short on good fabric shops as far as I can determine). So, being the spendthrift, DIY, crafty sort of person that I am, I bought myself some super cheap king-sized flat sheets from Wilkinson's (one in light green and one in teal) and cut them both in half, sewed them together (green on one side, teal on the other) folded the top over till the length was where I wanted it (just touching the floor) pinned and sewed in my loop for the curtain rod and voilĂ ! My awesome two-tone bedroom curtains, which do a fairly decent job of blocking out the sunlight and peeping neighbours and match the rest of my bed linens fairly well.

    Next it was on to the three windows in our lounge. I knew I needed two sets of curtains for these (the middle window is larger then the other two) and I wanted floor length with fat horizontal stripes. Checked everywhere for these, couldn't find them for sale anywhere in the UK (including online). But i did find a couple tutorials on how to make my own, which seemed a bit complicated, so generally I ignored them and made it up as I went along.
    Again, straight to Wilko's for cheap sheets, I had to get four this time, two teals and two white's. There was a bit more measuring and math to do as well to sort out the width of my stripes and how many panels I could get from each sheet without wasting material. In the end I made a cardboard template so that each stripe would be exactly the same and once the panels were cut I trimmed off the seam allowance from my template to help make sure that my stripes all came out even and straight as I pinned and sewed them together.
    So once the panels were sewn together I hemmed them all around and again used my curtain rod to help me find the right length, pinned and sewed in a loop. Now at the time I didn't have the spare change for extra white sheets to do the lining on these, so I just left them semi-transparent, which is fine because we don't hang around naked in our living room, or try to sleep in there (although sometimes a nap happens). But someday in the near future I will go and get a couple white sheets, half them down the middle and line these bad boys. Probably just unpick my curtain rod loop seam, add the lining sheet, then sew them both back up along the old unpicked seam again. Anyway, whole project cost me less than £20 for the four curtains, which is mega savings when I could have ordered something similar for four times that amount! Pretty awesome I think.

Saturday 17 August 2013

Lemon Curd

    Today I was very brave. I made Lemon Curd. I had heard (on my many jam related searches on the internet) that lemon curd was really difficult, people said that their curd went lumpy and curdled or didn't set at all, that it tasted funny, turned a gross colour, you name it it seemed like it happened. In fact The Curd has a bit of an online reputation of being a real challenge. So I avoided it, I mean it has eggs in it, so I figured it had to be difficult, I'm used to standard issue fruit and sugar preserves, eggs just complicate things.
    But on a trip to Bolsover Castle (a weekend adventure with my hubby) a free sample of local Lemon Curd was on offer and I tried some and it was tasty and I immediately desired a jar or two for my fridge. It was a bit of a gross day outside, perfect weather for slaving away in the kitchen, so when we got home I decided I would check my Jam Book for a recipe and obviously there was one, because there's a recipe in this book for just about everything (including kumquats). Tom graciously agreed to drive me up to Tesco for supplies and even handed over £5 for the Curd cause.
    I took a deep breath and decided I had better follow all the directions exactly (I seem to have a hard time doing this). I even purchased enough supplies for a second attempt, convinced I would fail the first time. Here's the recipe I used:
Lemon Curd
Note to self: get one of those juicer things where
the bottom attaches to form a bowl.
2/3 cup lemon juice - filtered, no bits floating around in there and the zest of 1 lemon (optional)
1 cup sugar
6 Tbsp unsalted butter
2 eggs
2 egg yolks  
    The recipe suggested that although you can make lemon curd in a saucepan, a double boiler was suggested to make sure it cooked more evenly. so I set up a makeshift one with a saucepan of simmering water and a glass bowl that fit nicely inside it. I melted the 6 Tbsp. of butter in the glass bowl.
    While the butter melted I beat (technically I suppose I whisked, since I used a whisk) the eggs and egg yolks till they were smooth then added in the lemon juice and mixed this until it was smooth.
    Back to my butter on the double boiler, once it was melted I added the sugar gave it a stir and then stirred in the lemon and egg mixture. I carried on stirring this mix over medium-low heat for about 5-10 minutes until it thickened. The test was to dip a spoon in the mix then draw a line across the back of the spoon. When the curd holds the line and doesn't infill it then it's done (also I checked it was a thermometer, 160 F). You can add in the lemon zest at this point if you want, I did. Then it was into some jars, lids on, labels and left to cool for a bit before they went into the fridge.
The finished curd, yum!
    And, guess what, it really was that simple! No curdling, no failure to set, it's still very much yellow and it tastes like Lemon Curd! So I'm not sure where all these chat room sorts are going wrong, unless the secret really is the double boiler method. I can see how a regular saucepan might cause some problems, you'd have to really work hard to regulate the temperature and make sure it cooked evenly. But altogether it took me about half an hour and it was one of the cheapest preserves I've managed to date, less than £5 and I still have enough supplies left to make a second batch!. I got three small jars of curd from this recipe and it tastes lovely, although I did have to make a batch of scones quickly so I could test it out.
    So if you've been avoiding the Curd challenge because you too have been intimidated by it's online reputation as being a difficult beast to master, I strongly encourage you to have a go at it, it's not so scary after all.

Thursday 8 August 2013

Tayberry Jam

    So a couple weeks ago I visited my friend's PYO in Hartley Wintney, Hampshire, West Green Fruits. There I discovered a entire section dedicated to hybrids (crosses between blackberries and raspberries). After diligently trying each type of hybrid berry I settled on the Tayberry. Named after the River Tay in Scotland, these berries were created by Derek L. Jennings of Dundee in 1979. They were sweet and fragrant and basically just tasted awesome. I had intended to get some boysenberries or loganberries, but the Tayberries were just so much nicer that I couldn't resist. I picked about a kilo (one heaped full punnet) and gladly paid for my spoils. As I wasn't at home I had to wash and freeze my berries at my in-law's so they would keep until I got home. I wouldn't really recommend this, as it makes the berries go all mushy and messy when they thaw. But since it's a four hour drive from Hampshire to Sheffield and we don't have AC in our car, it was really my only option.
    Once I got home I got out my jammy bible and had a sift through it, hoping to use a recipe for Boysenberry Jam, but to my dismay I didn't find one! I could tell you how to make jam out of all sorts of strange and wonderful things, but hybrid berries are not given their fair due in my Jam book. So I had a quick flick through the recipes for Raspberry and Blackberry Jam. You would think these would be almost identical, but they're not, blackberries have much more natural pectin then they're red cousins, so less lemon juice and sugar are needed for the jam to set than with raspberries. I decided to get creative and use a combination of the two recipes to sort out my Tayberries. turns out I got it about right, the jam set and tastes good anyway. Here's my recipe.
Tayberry Jam
1 kilo (32 oz / 2.25 lbs) Tayberries
2.5 cups sugar
2 Tablespoons Lemon Juice
    I started by washing the berries and making sure all the bits of leaf and stems and bird muck was all of them. I usually do this in my pasta strainer under the running cold tap. Once I wash them I weigh them, to see how much sugar I need. Since I sort of made this one up as I went along it was lucky I had exactly a kilo of fruit, otherwise the recipe would be really hard to convert for larger quantities. Then it's into the pot they go with the lemon juice and sugar.
     I cooked them gently on medium heat and gave them a mash with my hand potato masher just to break them up a bit. Now, I like my jam seedy, I think it's a nice texture and adds a little flavour, but if you don't like seeds then you'll definitely need to strain these berries. So instead of adding in the sugar and lemon juice straight away, gently cook the berries to soften them, mash them up and then pass them through a food mill or course strainer to get rid of the seeds, then add the sugar and lemon juice.
    Then it's pretty much like any soft fruit jam process. Cook gently until the sugar completely dissolves and then turn up the heat and bring to a boil. Stir it almost constantly so you don't get any sticking to the bottom of the pot and burning. Keep doing this till a drop of the jam mounds or skins over on a chilled dish. This took about 15 minutes in my case, pretty similar to raspberries, nice a quick. pour the jam into some sterilised jars and pop on the lids, let it set at room temperature for a few hours and it's good to go.
     I got three smallish jars of jam for my kilo of berries, so total cost per jar would probably have been somewhere around £1.80 per jar, not too shabby if you ask me. And let me tell you, this stuff tastes so good it might just put you off any other jam forever. My house smelled so good while I was cooking it that my husband came down begging to let him try some (he couldn't, it was boiling hot, I did let him have the spoon when I finished though). And the taste is heavenly, it has the texture and sweetness of blackberry jam, the acidity of raspberry jam and an aroma almost like a rose or a really sweet ripe citrus fruit. it is definitely my new favourite. We've been trying really hard not to just eat it straight from the jar by the spoonful!
    Needless to say I'll be back at West Green picking these berries again next summer. I wish we lived closer so I could go back for a couple more punnets straight away, we'll have to ration our three jars to make them last all year. I'm also excited to try some of the other hybrid berries they have and see how they turn out in jams, and if they taste significantly different or not. Based solely on my pre-picking taste tests, I think there's a lot of potential for some amazing flavours.